FIXING CORNICES
CUTTING OF MITRES
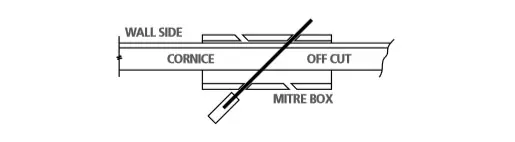
Measure wall. Mitre-cut scotia to length. When a scotia or cornice has the same projection down the wall and across the ceiling, a mitre box is a handy aid.
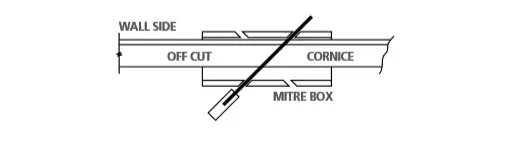
When cutting mitres, always keep the wall edge of the cornice uppermost on the outer side of the mitre box.
External Mitre
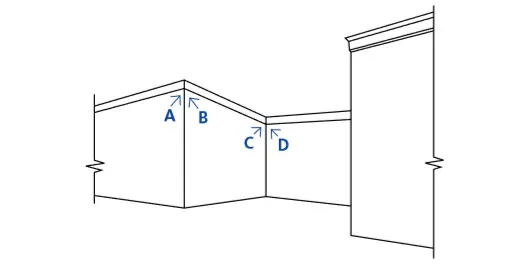
To suit position A on the ceiling illustration.
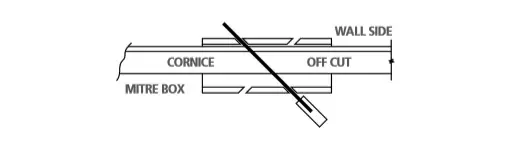
External Mitre
To suit position B on the ceiling illustration.
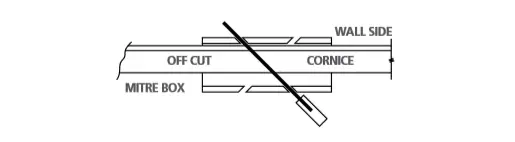
Internal Mitre
To suit position C on the ceiling illustration.
Internal Mitre
To suit position D on the ceiling illustration.
DECORATIVE CORNICES
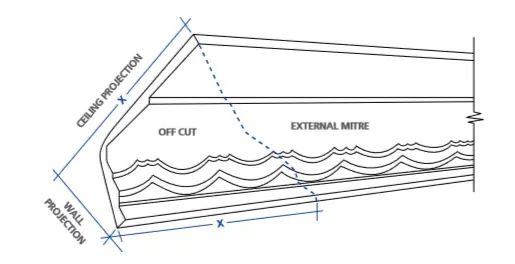
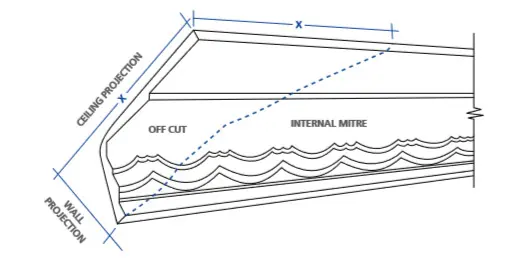
With Decorative cornices however, the ceiling projection is generally greater than the projection down the wall. Proceed using the same principle as when using a mitre box. Position the cornice ready for cutting. Measure the ceiling projection and mark on the top member of the cornice.
Draw a line from this mark to the edge of the cornice. You now have the correct angle for your cut.
Use the same principle for all internal and external mitres.
Working from the centre line of one wall, ensure that a matching module or part of a module occurs at each end of the first wall (designs are in repeating modules).
Use the same principle for the other walls. It is likely that the last mitred cornice may not match, this is not considered abnormal.
FIXING CEILING ROSES / CEILING CENTRES
Safety First - Organise an Electrician!
Have an electrician isolate light fittings before drilling a hole through the centre of the ceiling centre to push the light fitting wiring through.
Preparation
If ceiling is painted you can scuff with 120grit sandpaper and lightly score area where ceiling centre will cover with a stanley knife or alternatively you can paint bondcrete onto area to ensure cornice cement will adhere. If ceiling is new no preparation is necessary.
Make sure all surfaces to be glued are clean and free of flakey paint or loose material.
Installation
Mix dry cornice adhesive to the instructions on the packaging.
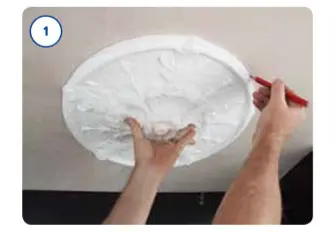
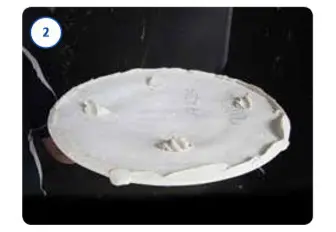
Apply cornice adhesive around back perimeter of ceiling centre. Be careful not to apply too much so it does not creep out from under the edge of the ceiling centre.
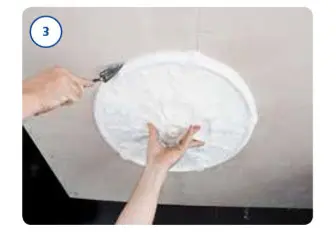
Push the ceiling centre into the required position on the ceiling and hold for a few minutes.
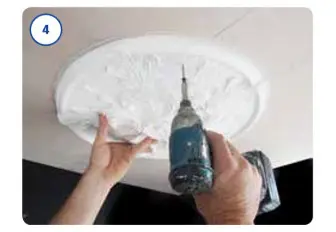
Drive two or three screws of suitable length through the ceiling centre into ceiling joist or batten and prop the ceiling centre from the floor to hold into position until adhesive sets.
When propping use a soft surface to contact the ceiling centre face to eliminate surface damage. An old towel or sponge is ideal.
Wipe / scrape off excess cornice adhesive with a sponge, brush or small tool.
Once dry must be painted with sealer undercoat, then it can be painted any colour.